Make your own really cute mini box without a Big Shot or loads of measuring. Simply print an MDS2 template onto card stock, cut/score, and decorate; with free Sale-A-Bration goodies! Don’t have MDS2? Try it out for FREE for 30 days. I think you’ll love it!
SUPPLIES I USED
Stamp: Teeny Tiny Wishes (115370 W, 127802 C), Mini Project Box-Digital Download (120171)
Ink: Island Indigo Classic Stampin’ Pad (126986)
Paper: Pool Party card stock (122924), Island Indigo card stock (122923), Whisper White card stock (100730), Sycamore Street designer series paper (127540-available only with qualifying Sale-a-Bration order)
Tools & Accessories: MDS2 (130646), at home printer, Paper Snips (103579), Bone Folder (102300), Modern Label Punch (119849), Sycamore Street Ribbon & Button Pack (130812-available only with qualifying Sale-a-Bration order), SNAIL Adhesive (104332), Stampin’ Dimensionals (104430), Sticky Strip (104294)
INSTRUCTIONS
- Open MDS2 and select a new blank project, sized 8-1/2×11, portrait orientation
- Open the stamp brush set for Mini Project Boxes and drag over the first one, the square box.
- With page-bleed ON, make the box template as big as you want, without going over the margins. You can also leave the box exactly as it comes over, without any adjustments in size.
- Using your printer and Pool Party card stock, print this page.
- Cut along the solid lines on your box template with Paper Snips and then score your dashed lines. Then reinforce your scored lines with your bone folder. Fold the box so that the lines printed on the card stock end up on the inside of the box.
- Use a ruler to determine the size of the designer series paper and card stock panels you will need for your project. The measurement will vary depending on how you sized your box in MDS2. My front DSP piece is 2”x2”, for example, so my Island Indigo piece is 2-1/8”x2-1/8.”
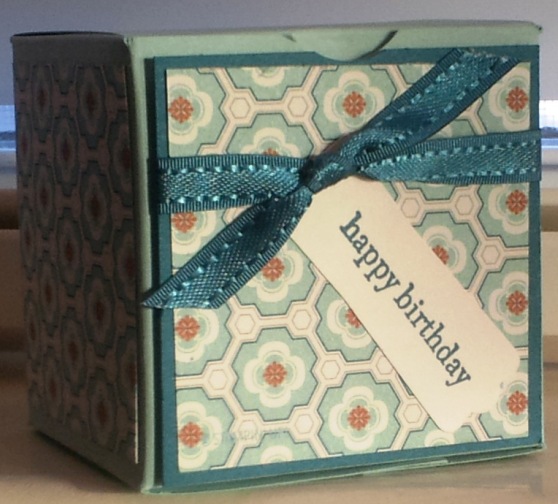
- Adhere your designer series paper onto your side and back box panels with SNAIL Adhesive. Layer a square of DSP onto a slightly larger square of Island Indigo card stock and adhere to the front panel of your box using dimensionals.
- Slide the Island Indigo ribbon under the raised front panel of the box, tying into a knot.
- Stamp the “happy birthday” sentiment and punch it out with the Modern Label punch. Adhere to the front of your box using SNAIL Adhesive.
- Construct your box using Sticky Strip.
- Fill the adorable mini box with candy, jewelry, or other small gifts and give it to your loved one!
Happy Gift Giving!