You CAN Make Your Holiday Cards!

Oh, Yes! You certainly CAN make your own holiday cards this year. The key is to get started as early as possible, and keep your design simple!

Washi Tape Christmas Card - Visit http://www.mirrorimagecrafts.com for details and more projects!

Handmade Season of Style Washi Tape Christmas Card – quick and simple!

This card is just about the easiest card I’ve ever made! Stamp your sentiment, make your tree out of Washi Tape, add bling to the top and you are DONE!

The current Holiday Catalog from Stampin’ Up! has some terrific holiday stamp and accessory options for you, but the stamp set I used on this card is from the Christmas Carry-Over list. It’s called More Merry Messages, and you will only find it in my Online Store, along with a handful of other holiday sets not featured in the catalogs. Search my store for the following:

Christmas Carry-Over List for 2013-2014

  • Evergreen Stamp Set (also available in French)
  • Greetings of the Season Stamp Set (also available in French)
  • Jewish Celebrations Stamp Set
  • More Merry Messages Stamp Set (aslo available in French)
  • Ornament Keepsakes Stamp Set
  • Snowflake Soiree Stamp Set (also available in French and Spanish)


So, choose a carry-over set, a current catalog set, or create a beautiful holiday card in My Digital Studio. No matter what direction you go, you CAN make your holiday cards! Contact me with questions!

How to Participate in a Card Swap

As I was completing my most recent card swap, it occurred to me that some of my newer customers and readers may not know what a card swap is, or how to participate in one. This post is for you!

Perfect Blend card swap

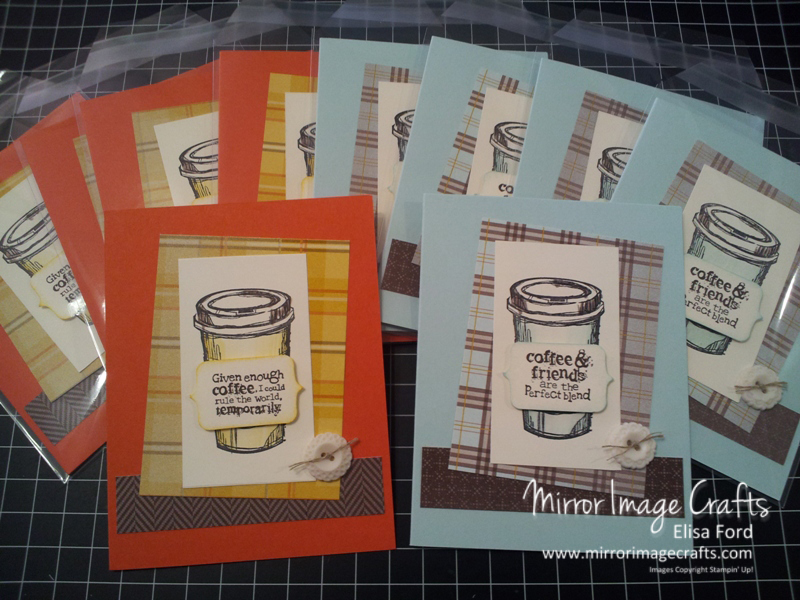
I swapped these Perfect Blend cards with my recent Stamp-A-Stack attendees who participated!

A card swap is where you swap some of your cards with cards other people have made. You will make all of your card swap projects the same, and make the number of swaps you are told by the coordinator. Here are some important things to know when participating in a card swap:

WHO IS SWAPPING?
Most of the swaps that I participate in are with Stampin’ Up! demonstrators. That is important to know only because sometimes that determines some of the swap guidelines (see below). Your card swap might include a variety of different stampers.

WHO IS IN CHARGE OF THE SWAP?
There is someone coordinating the card swap, so you’ll want to know who that person is and how to get a hold of them in case you have a question or encounter a problem.

WHAT ARE YOU SWAPPING AND WHAT ARE THE GUIDELINES?
I’m using the term “card swap” throughout this post, but you might be swapping something else. You may be participating in a swap of 3-D projects, scrapbook page ideas, artist trading cards, card fronts, or something else entirely. It’s very important to know what is expected of you so that you can follow the “rules” of the swap. As I mentioned before, most of my swaps are with other Stampin’ Up! demonstrators, so a common parameter is to use only current Stampin’ Up! product.

HOW MANY SWAPS ARE YOU SUPPOSED TO MAKE?
The card swap coordinator will let you know how many swaps you are expected to make. Sometimes they might say you should make 14 +1, which just means you are making 15 swaps – 14 for participants PLUS one for the coordinator. As a general rule, I make 2-3 extra cards beyond what I’m swapping. I like to have my own copies of my swaps and I might as well make them while I am making all the rest!

WHERE/WHEN ARE YOUR SWAPS DUE?
There is always a swap deadline you should follow. Some swaps you will exchange in person and some card swaps you will mail to the coordinator who will collect all of them and send them back to you. Don’t miss the deadline, or you will make everyone wait for their cards (if they are being mailed) and you risk not being asked to participate again.

Finally, one last piece of advice for you in card swapping: Never speak poorly of another person’s swap contribution. Everyone has different styles and stamping abilities. If a swap you receive doesn’t follow the guidelines then you could mention it to the swap coordinator, but otherwise just let it go and enjoy the projects that others have worked so hard to create for you!

“Best of Christmas” Stamp Set from Stampin’ Up!

Welcome to the “Best of Stampin’ Up!” stamp set for October… The “Best of Christmas!”

Each month I’ll post information here on my website about the NEW “Best Of” set for that month:

The Details:

  • All “Best Of” stamp sets will include 3-5 images, including a never-before seen image, and will be priced at $14.95.
  • While just one “Best Of” stamp set will be released each month (with a new theme each month), all of the “Best Of” sets will be available until March 31, 2014.
  • All “Best Of” stamp sets are available in Clear-Mount only.
  • As a special incentive to collect the “Best Of” stamps, starting in February there will be a collector’s card and 25-year proof of purchase sticker included with every “Best Of” set. Collect six stickers, and send it in to redeem a FREE set of your choice valued up to $14.95! Free sets must be redeemed no later than April 30, 2014.

DOWNLOAD the Collector’s Card HERE!

Contact me for more information or visit my page every month to see what’s NEW!

Happy Stamping with the NEW “Best of Christmas” Stamp Set from Stampin’ Up!

How I Store My Craft Punches

In this sixth post in my “Storage Series” I share how I store my craft punches.

I have Stampin’ Up! punches (exclusively) in two different “body” styles. The older style, or “whale tail” is stored like this:

Punches-oldbody-storage

I LOVE storing my punches like this! I stole the idea from another demonstrator years ago. I especially appreciate how easy they are to access and see what I have. I have labeled each pocket, just so I can be sure to put the punches back where they belong.

Punches-newbody-storage

My newer body style punches are stored in my top dresser drawer in another wire basket from the dollar area at Target. My smallest punches are inside (you guessed it!) another Iris container! I will likely outgrow this storage space and need to resort to another plan soon. I’m actually considering re-doing my entire craft area in order to maximize space and attempt to keep ALL of my supplies in my craft room so that I won’t have to run between the craft area and my office to get supplies.

I’ve seen a bunch of really great storage for punches. How do YOU store your punches? Tell us in the comments!

I sincerely hope you’ve enjoyed my “Storage Series” and learned some new ideas. I’ll update as I make changes. As I’ve said before, you have to work with the space you have and the ideas that work best for you, your space, and your budget. Let me know if you have any questions!