More Amore Project 2: MDS Kit of the Month

I hope you enjoyed my first two More Amore projects for my MDS Kit of the Month.

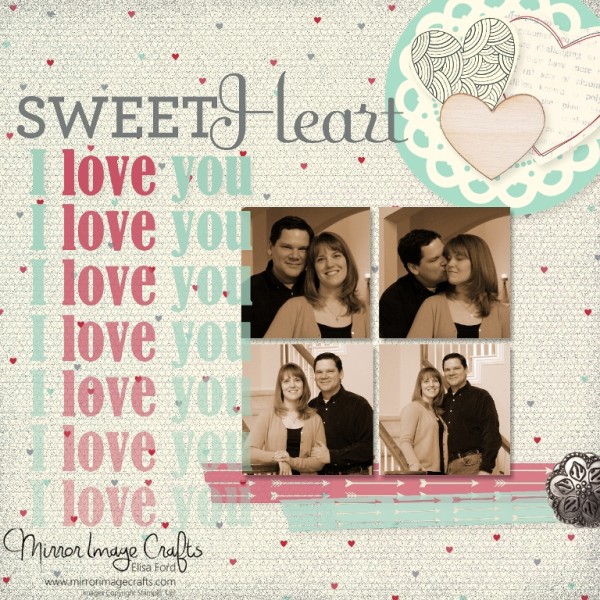
I’ve created a second scrapbook page using the same items, with a completely different look!FEB2015 Scrap-More Amore-001
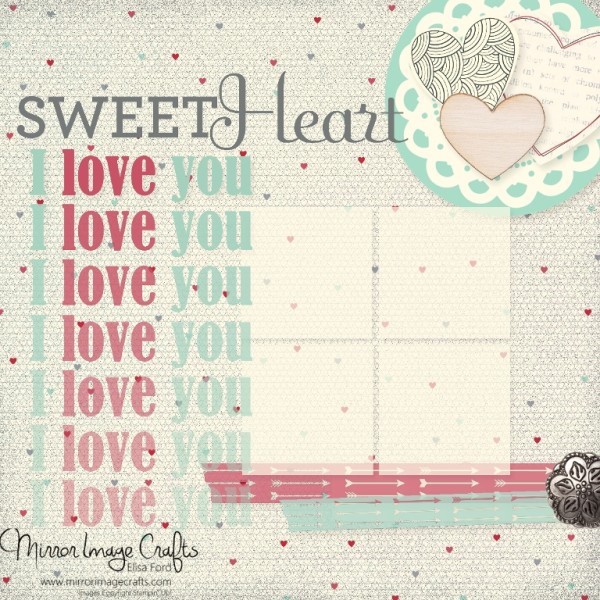
For this page I used a background paper from the More Amore designer series paper. This paper actually has a quote on the bottom right corner, which is lovely, but not what I wanted for this project. So I found a way to cover it using re-colored Retro Fresh Washi Tape and an Antique Brad (included in the MDS software).

The “I love you” is a stamp brush, which I colored once and copied/pasted until I had seven lined up. I reduced the opacity on each stamp as I went down the line, to make the faded effect. The “Sweet” and “Heart” are two different stamps which I cropped to get the look I wanted. Finally, I added some embellishments in the upper right corner: More Amore hearts and a heart from Everyday Woodcuts.
FEB2015 Scrap-More Amore-002


I hope you enjoy this new MDS Kit of the Month feature! See you for the next one in March!

LOCAL FRIENDS: Save the Date and plan to join me for my next “Getting Started with MDS” class on May 1st!  Not nearby? Get your free 30-day trial software from me and I’ll send you a link to get my 10 free tutorial videos to help you get started using MDS!

In Love with Valentine’s Day: Class Projects

Are YOU ready for Valentine’s Day? You are if you make one or all of these adorable projects! We made these at my recent “In Love with Valentine’s Day” class!

The card on the right uses Crumb Cake cards & envelopes, which come in a package of 20, already cut and scored for you! We simply stamped, added some Stacked with Love Washi Tape, and added the Sweetheart Punch heart on dimensionals.

The “so sweet” project in front of the card is a Ghirardelli chocolate holder! We used the Ornate Tag Topper Punch, Stacked with Love designer paper stack, and the Hello Life photopolymer stamp set. It’s tied with a simple white baker’s twine, and has a single rhinestone embellishment.

The box project on the left uses one of my favorite items: Tiny Treat Boxes! They are 2-inch cubes, 25 per package. We added some designer paper, a Red Glimmer Paper (no glitter-shedding!) heart punch and tied it up with a Real Red cotton ribbon bow.

The final card is a shaker card. The window is cut with the Word Bubble Framelits, and the tiny hearts inside were punched with the Hearts Border Punch.

Let me know if you have any questions. You can order all the supplies for the above projects from my Online Store, 24/7! Order NOW for Valentine’s Day projects – orders typically take 7 days to arrive unless you pay extra for expedited shipping.

AND Sale-A-Bration is going on right now, so with every $50 in merchandise you receive a FREE item from the Sale-A-Bration catalog!

RSVP Deadline for MDS Class!

The deadline is TODAY to RSVP to join me for “Getting Started with MDS!” I hope you can attend this FREE class where we’ll go over the basics of My Digital Studio so you can see just how simple it is to use.

If you cannot make the class, but still want to TRY the software for 30 days for FREE, click this link: MDS FREE 30-Day Trial

I’ll send you a link to receive my 10 video tutorials during your trial period!

I have room for a few more attendees, so email me right away so you don’t miss out!

Handmade Holidays Box Decor Project Using MDS

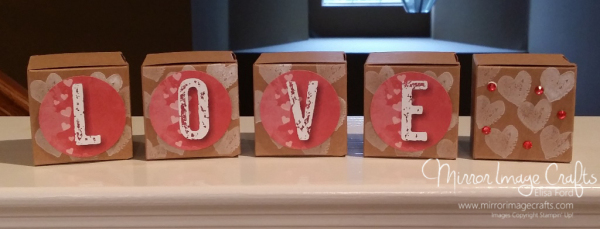
In my upcoming Handmade Holidays class, we will be making this MDS-hybrid decor box project!

I created these two pages from scratch in My Digital Studio. I knew what size I wanted my circles to be for the project and designed it around that. The JOY letters are punches and the LOVE letters are a stamp brush. I added a drop shadow effect to the letters for both pages.

Here’s how my final project looks, after punching the letters out with my 1-3/4″ Circle Punch, stamping on the Tiny Treat Boxes with White Craft ink. I used the heart from the Work of Art stamp set and the snowflake from the Cheerful Tags photopolymer stamp set. For a finishing touch I added Rhinestone Jewels (colored with permanent markers) to the end boxes. I used the same 5 boxes for both sets of letters, just stamped and put the letters on opposite sides!

decorboxes-joyside decorboxes-loveside

My Handmade Holidays class is on Friday, November 14th, and the registration deadline is this Friday, October 31st! Click here for my info page and to register TODAY!

If you want to learn the My Digital Studio aspects of this project, join me on Friday, November 7th for my Getting Started with MDS class! Click here for info and to RSVP for this FREE class by Tuesday, November 4th!