I’m Going On Vacation… And You Get This Special Offer!

I am heading on vacation soon, for the first time in many, many years. So I am naturally pretty excited about it!

Because I don’t want any of my amazing customers to feel slighted in any way while I am “out of the office,” I have an special offer for you!

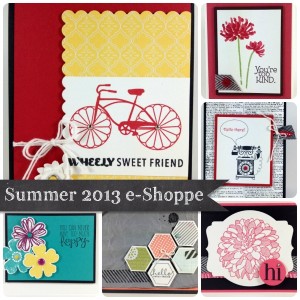
Place a $43 order through my online store between July 19 – July 28, and I will send you a FREE card class PDF. This one has  photos, ingredients, and full instructions for 6 projects using supplies from the NEW Stampin’ Up! Annual Catalog for 2013-2014.

Free Card Class with Online Order

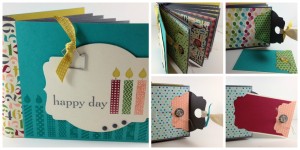
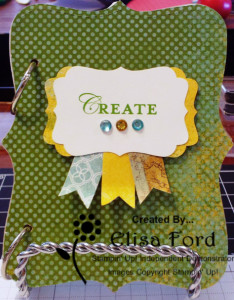
Double your order to $86 (in honor of my twin sister!) and you will also receive a FREE class PDF to make this adorable Birthday Brag Book.  In addition to full instructions, ingredients and photos, like the project above, this class also comes with VIDEO instruction to make the book.

Birthday Brag Book FREE class with Online Order

The Fine Print:

  • Orders must be placed in my online store. I will not be available to place orders for you while I am on vacation.
  • Orders must be placed between July 19 – July 28.
  • If I am able to do so, I will send your class PDF(s) to you via email while I am away.  However, I am not sure of my internet access while away, so you might have to wait until July 29 to receive your class(es).
  • The email I will send your class(es) to will be the one you use to place your order through my online store. Please make sure to check your “junk” folder for the class(es) or save my email address to your safe list: elisa@mirrorimagecrafts.com.

Here’s the link to my Online Store again

If you would love access to these classes, but can’t place an online order, book an in-home workshop with me for September, October or November, and I’ll send you the class of your choice!  Email me between July 15 – 30 to take advantage of the booking special!

“Best of Shelli” Stamp Set from Stampin’ Up!

Welcome to the “Best of Stampin’ Up!” stamp set for July… The “Best of Shelli!”  Shelli Gardner is Stampin’ Up!’s co-founder and CEO!

Each month I’ll post information here on my website about the NEW “Best Of” set for that month:

The Details:

  • All “Best Of” stamp sets will include 3-5 images, including a never-before seen image, and will be priced at $14.95.
  • While just one “Best Of” stamp set will be released each month (with a new theme each month), all of the “Best Of” sets will be available until March 31, 2014.
  • All “Best Of” stamp sets are available in Clear-Mount only.
  • As a special incentive to collect the “Best Of” stamps, starting in February there will be a collector’s card and 25-year proof of purchase sticker included with every “Best Of” set. Collect six stickers, and send it in to redeem a FREE set of your choice valued up to $14.95! Free sets must be redeemed no later than April 30, 2014.

DOWNLOAD the Collector’s Card HERE!

Contact me for more information or visit my page every month to see what’s NEW!

Happy Stamping with the NEW “Best of Shelli” Stamp Set from Stampin’ Up!

How I Store My Stamping & Scrapbooking Tools

In this third post in my “Storage Series” I share how I store my stamping & scrapbooking tools.

The tools I use most frequently tend to “live” on my craft table. If you read my previous post called “What’s on my Craft Table,” then some of this will look familiar to you.

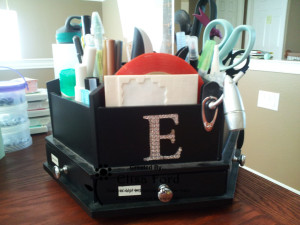
Small tools which I use all the time stay in my “black spinny.” This is the very technical name for it, of course.

black spinny tool holder

My “black spinny tool holder”

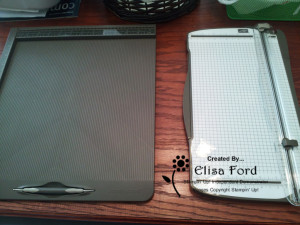
Medium-sized and larger tools also stay on my craft table, if I use them often enough.

scoring & cutting tools

Simply Scored Tool & Paper Trimmer (both Stampin’ Up!) Not pictured- my clear blocks.

Tools I use infrequently I keep in a few different locations:

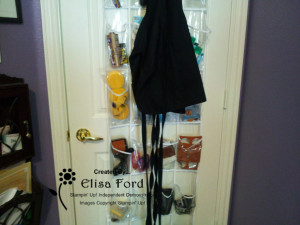
1. shoe organizer on the back of my office door

shoe organizer for tool storage

Shoe organizer used for tool storage (Stampin’ Up! apron not included)

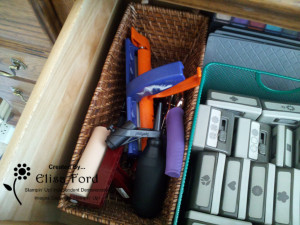
2. dresser drawers next to the craft table

dresser drawer storage for tools

Top dresser drawer – tools stay in the basket next to my punches (punch storage is another topic!)

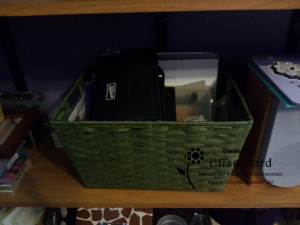
3. inside boxes on my shelves in my office

office shelves baskets for tool storage

On the shelf below my stamps, I have several baskets like this one, holding tools I use infrequently

I hope seeing how I store some of my tools for stamping and scrapbooking will help you get ideas for your craft space. I am here to help you with ideas, if you need me! If you are local to me, I hope you’ll come to a class or event soon, and see my space “in action.”

Epic Day Mini Brag Book

epic day mini brag book

This adorable Epic Day mini brag book comes together quickly and can be used for so many purposes. Keep it for yourself or give it to a friend! I plan to use mine to jot down craft ideas and sketches.

SUPPLIES:

Stamps: Loving Thoughts (128436 W, 125845 CM)

Ink: Gumball Green Classic Stampin’ Pad (126861)

Paper: Whisper White Card Stock (100730), Epic Day This and That Designer Series Paper (130814)

Tools & Accessories: Big Shot Die-Cutting Machine (113439), Top Note Bigz Die (113463), Rhinestone Basic Jewels (119246), Decorative Label Punch (120907), Multipurpose Liquid Glue (110755), SNAIL Adhesive (104332), Stampin’ Dimensionals (104430), yellow & turquoise permanent markers, binder rings, chipboard, hole punch or binding system

INSTRUCTIONS:

  1. Using the Top Note Die and the Big Shot:
    1. Cut a front and back cover for the brag book out of chipboard
    2. Cut a designer series paper (DSP) cover for the front and back
    3. Cut the inside pages with Whisper White card stock (as many as you’d like!)
  1. Adhere the DSP to the front and back cover of the brag book chipboard using liquid glue
  2. Stamp the sentiment of your choice with Gumball Green ink onto Whisper White card stock and punch out with the Decorative Label punch.
  3. Punch a piece of DSP with the decorative Label punch and cut in half. Adhere each half to the back of the stamped white piece as shown in the photo.
  4. Cut three 1/2” DSP strips and cut the ends to look like banners. Adhere them to the back of the sentiment piece using SNAIL.
  5. Adhere the entire sentiment piece to the front of the mini brag book using dimensionals.
  6. Color rhinestones using permanent markers and adhere to the front of your sentiment piece as shown.
  7. Cut two binding holes through the front & back cover, as well as the inside pages, using a sturdy hole punch and hold together with binder rings — or bind the book with your favorite binding system.

Leave me a comment and let me know what you think. What would you use your mini brag book for?