Handmade Holidays Box Decor Project Using MDS

In my upcoming Handmade Holidays class, we will be making this MDS-hybrid decor box project!

I created these two pages from scratch in My Digital Studio. I knew what size I wanted my circles to be for the project and designed it around that. The JOY letters are punches and the LOVE letters are a stamp brush. I added a drop shadow effect to the letters for both pages.

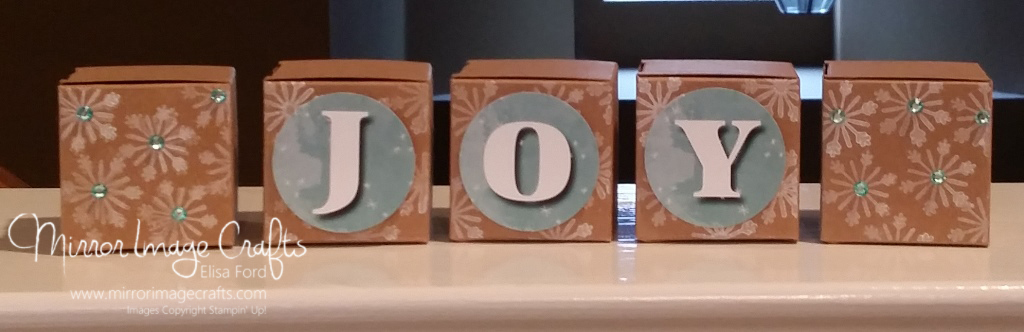
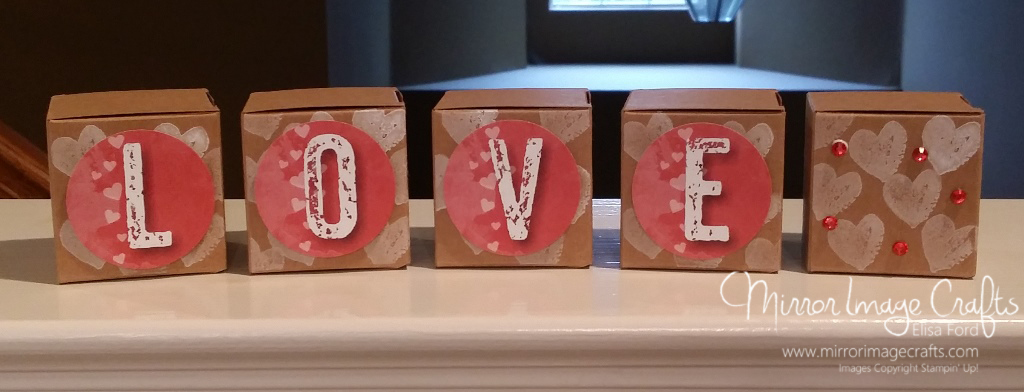
Here’s how my final project looks, after punching the letters out with my 1-3/4″ Circle Punch, stamping on the Tiny Treat Boxes with White Craft ink. I used the heart from the Work of Art stamp set and the snowflake from the Cheerful Tags photopolymer stamp set. For a finishing touch I added Rhinestone Jewels (colored with permanent markers) to the end boxes. I used the same 5 boxes for both sets of letters, just stamped and put the letters on opposite sides!

decorboxes-joyside decorboxes-loveside

My Handmade Holidays class is on Friday, November 14th, and the registration deadline is this Friday, October 31st! Click here for my info page and to register TODAY!

If you want to learn the My Digital Studio aspects of this project, join me on Friday, November 7th for my Getting Started with MDS class! Click here for info and to RSVP for this FREE class by Tuesday, November 4th!

MDS Project: Welcome Banner

MDS welcome bannerMDSwelcomebannerhangingWELCOME! I love scrapbooking and making cards in MDS, but I also love coming up with different projects using this terrifically versatile software!

Today I’m sharing this welcome banner project I made using My Digital Studio by Stampin’ Up! This banner was made this past summer for my New Catalog Open House. To make the banner within MDS, I used a blank template for 5″ x 7″ postcards. I made the banner to be viewed in both directions, so the postcard was perfect for that! The back of the “W” is an “E”, and so on…

The digital items I used for this banner are all from a kit called Lemonade Stand, which was a download available only during Sale-A-Bration several years ago. I used a font on my computer called “Irish Spaghetti.” It was a free font, but I don’t recall where I got it.

Once the banner pieces were sent back to me from the printer, I used a corner rounder punch on all the corners, punched holes for the jute to go through, and tied black grosgrain ribbon (retired) as an accent.

As a bonus, since I used “postcards” to make the banner, and envelopes are included with postcards when printed through Stampin’ Up!, I have all the envelopes that came with the postcards to use for sending 5″ x 7″ cards. That will come in handy!

Postcards in MDS are available in 3 sizes: 5″ x 7″, 4″ x 9-1/4″, and 3-1/2″ x 5″ – select portrait or landscape.

If you’re local, I hope you’ll join me for my FREE “Getting Started with My Digital Studio” class. Email me TODAY to RSVP. I’m closing registration at 8 attendees!

My First Day – MDS printable from Stampin’ Up!

My First Day MDS download printable for first day of school!

My baby started Kindergarten!

One week ago, my son Liam started kindergarten! Of course I took a ton of pictures, including some with this sign! I used the My First Day printable from Stampin’ Up! (MDS download) just like last year. I just changed the school, the grade, and his teacher’s name. I printed this one at home, so the sign colors aren’t as good as if I had them printed online. I didn’t find out his teacher’s name in time to send this off for printing!

To try out MDS for digital crafting FREE for 30 days, click the tab for digital crafting above. It’s SO fun!