In this first post in my “Storage Series” I will share how I manage my Stampin’ Up! card stock & designer series paper (DSP). I’ve adapted this over the years, and I’m pretty pleased with my current storage situation. It works well for me right now… and that is what will be important when you are organizing YOUR own space.
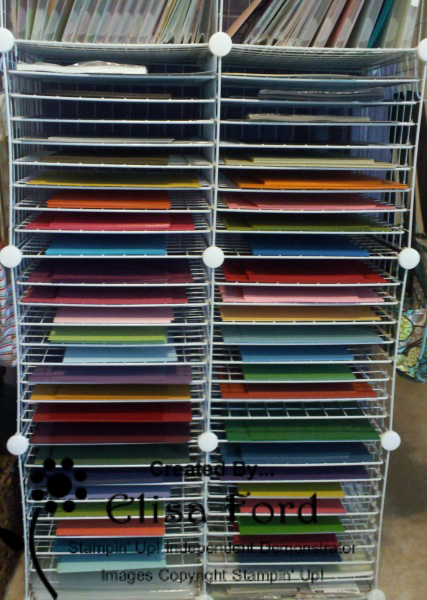 First, here is my card stock, stored on wire shelves you can find at many different stores. To accomplish this paper storage, you will need a couple boxes of the shelves and a bunch of zip ties to hold them together. I won’t go into how to build this today, but if you want more information you can email me! The card stock stored here is 12×12 & 8-1/2×11 full sheets that have NOT been cut.
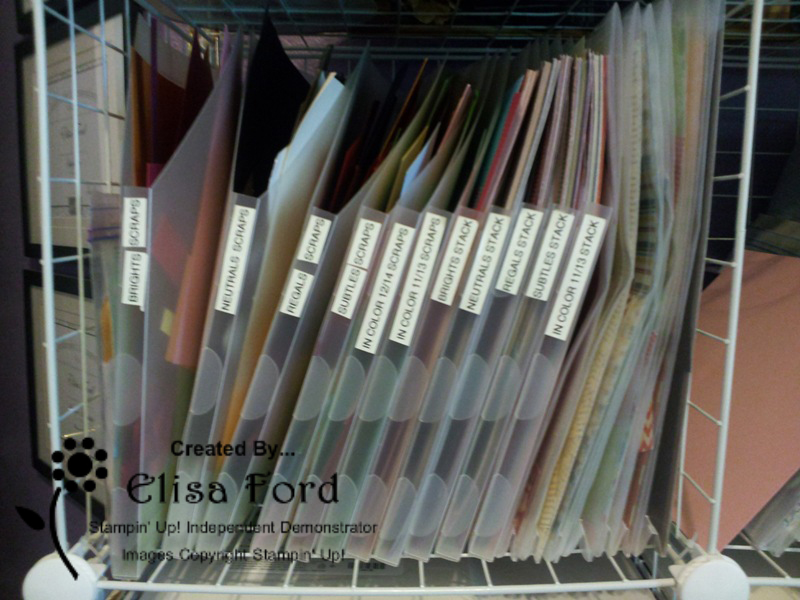 Next, here is where I store my larger scraps of solid card stock and my DSP. The open storage sleeves to the left hold card stock by Stampin’ Up! color family. The open storage sleeves in the middle hold my DSP paper stacks by color family. The closed storage sleeves on the right hold my DSP, separated by pack, as well as one sleeve for storing all 3 colors of glimmer paper. These sleeves hold full-size sheets and all scraps in the same holder. They key here is that I have labeled everything so I can easily find what I am looking for.
 Here is my card stock storage for my smallest scraps. I used to keep them all separated by color in small zip-locks in one box, but I like this storage by color family much better. It really helps me to NOT keep every single teeny, tiny scrap because I only have a certain amount of space per container.
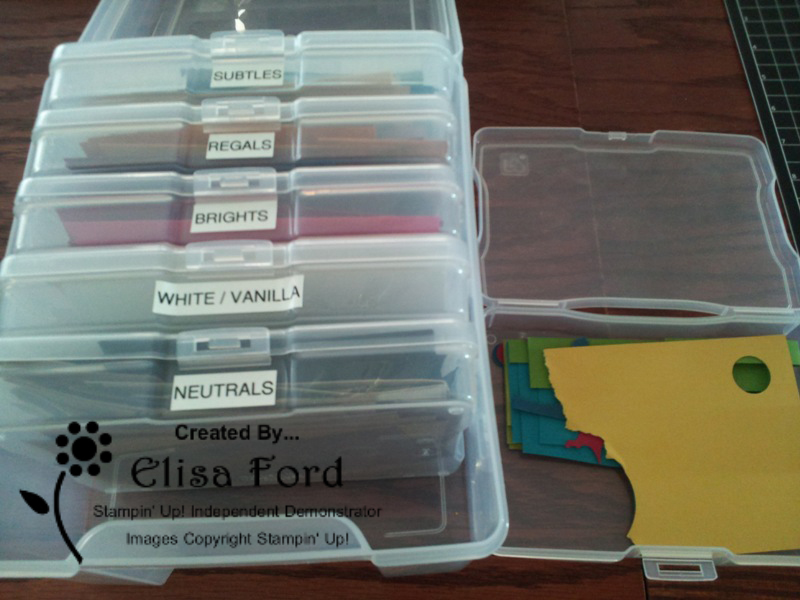
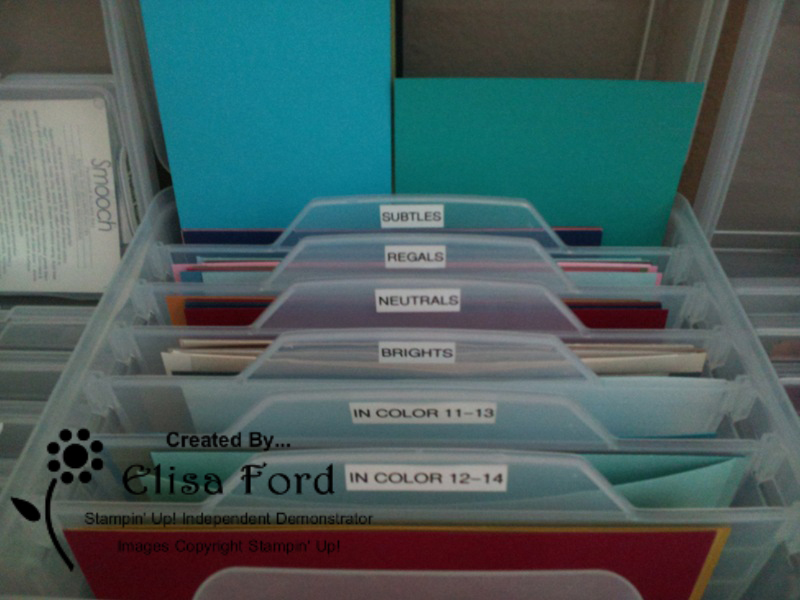 In this box (which is sold as a card holder, but didn’t work for me in that way) I keep my card stock, by color family, which is already cut into a standard card base size (8-1/2×5-1/2, scored at 4-1/4). This really helps keep me from cutting into a full-sized piece of card stock when I already have a card base ready to go!
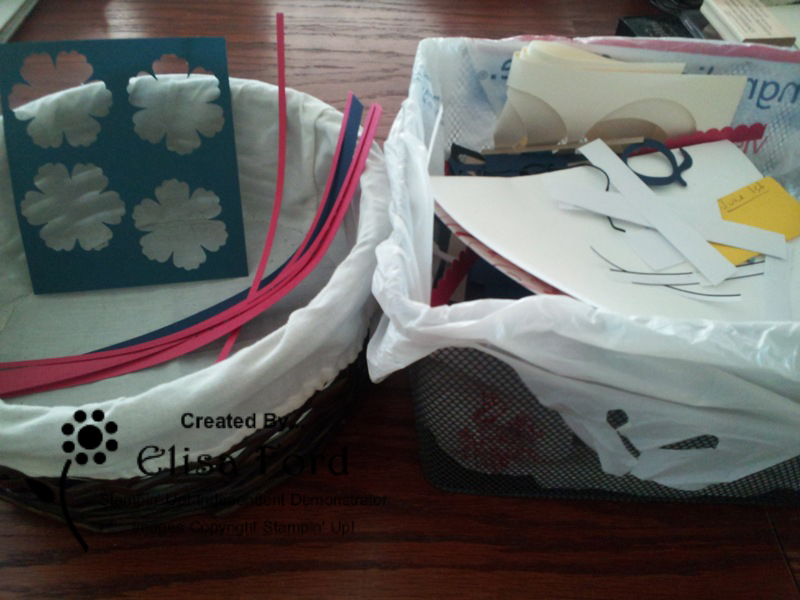 Finally, while I am crafting, this is how I manage my card stock and DSP. Small pieces I don’t need to keep go immediately into the trash on the right. Everything else goes into the basket on the left (except card bases & full-sized sheets) for me to put away at a later time.
I hope this article helps you with ideas for storing your card stock & DSP. If you have questions, please contact me. If you have your own storage for paper that works great for you, share it in the comments. I’d love to hear your ideas!